

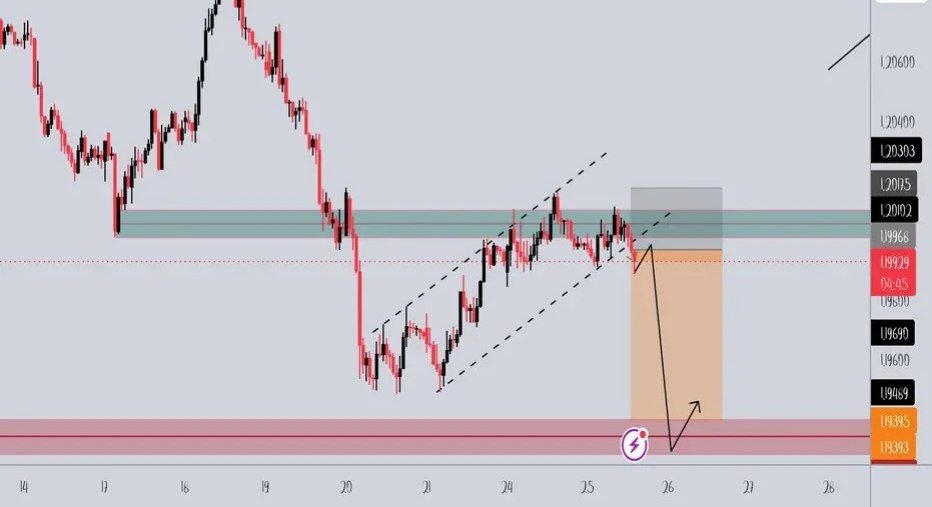
Market Structure
Price is showing clear rejection around the 1.2000 resistance / supply zone while continuing to respect the broader descending channel structure.
The current price action suggests that sellers are defending the upper boundary of the channel, creating the possibility of further downside movement toward the marked demand zone.
Bearish Scenario
The bearish idea is based on a simple combination:
- Rejection from the 1.2000 resistance / supply zone.
- Respect for the descending channel.
- Potential continuation toward the next demand zone.
As long as the resistance zone and descending channel remain intact, sellers may continue to have the technical advantage.
🛑 Invalidation
The bearish setup would be invalidated if price produces a sustained breakout above the 1.2000 resistance / supply zone and establishes acceptance above the channel boundary.
Trading Perspective
Rather than predicting the next move, traders should monitor how price reacts around the key levels. Confirmation of rejection can strengthen the bearish setup, while a sustained breakout would signal that the structure may be changing.
Trade the setup, not the prediction. 📊
Educational content only. This analysis is not financial advice. Always use appropriate risk management and confirm price action before entering a trade.
Comments (0)
No comments yet. Be the first to comment.